Showing posts with label Tutorial. Show all posts

Saturday, October 5, 2013

Ten Halloween Tricks & Treats!

Here's a round-up of my favorite Halloween Tricks & Treats--try something tasty, spooky, or fun!
1. Whip up some Autumn Punch when entertaining guests!
2. This Vampire Bite Necklace is the perfect subtle piece--it's even suitable in the workplace!
3. A Silver Bullet Necklace keeps protection from werewolves close!
4. Follow this guide to plan the perfect Halloween Cocktail Party!
5. For a weekend treat, whip up some Pumpkin Buckwheat Pancakes!
6. Coconut Oatmeal is perfect for those crisp autumn mornings--healthy & delicious!
7. Make a Spooky Halloween Wreath with items from your local thrift shop!
8. Zombify your family photos for Halloween decor with a personal touch.
9. This Hair Fastener DIY is a whimsical take on a Hitchcock classic.
10. A Jeweled Skull keeps Halloween classy, people!

If you try any of these, please let me know and share your photos! I'd love to see how they turn out!

♥ Shannon

Monday, March 11, 2013

Wear Green!

I think St. Patrick's Day encourages a little bit of over-the-top fun, so I love going big with my green--especially hair pieces! Here's a round-up of past tutorials for green hair flare!
1. Quick & Easy Oversized Hair Bow
2. Clover Headband
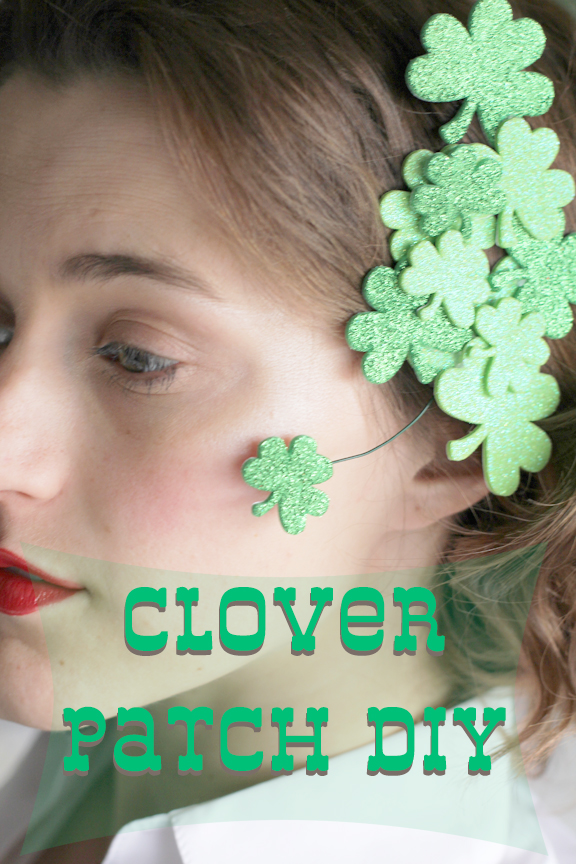
3. Clover Patch Hair Piece

I'm teaching a dance class Sunday morning and I've warned my students that I will pinch them! Maybe.

Also, looking back on past tutorials is kind of intense--I've been watching my taste and style slowly evolve away from what Past Me preferred. Does that happen to you guys?

 Shannon

Monday, October 8, 2012

Jeweled Skull DIY

My favorite way to decorate for Halloween is to go with my movie prop approach: anything goes as long as it could be a prop for a scary movie. Things that could be in a real haunted mansion or a run down cemetery or a spooky forest.
But I also enjoy a little glam, especially if it's for a party!

This Jeweled Skull DIY is soooo easy and quick. It took me about 10 minutes to make, and about an hour to dry. All you need is a prop skull, jewels (I used pearls in two colors and three sizes), and some clear-drying glue.

Fill one eye socket with jewels and glue them down. Splay a few more across the face however you like, and add a few more in the opposite eye. Remember to use the rule of odds--stack your jewels in groups of 1, 3, 5, etc. Something to do with nature and ratio...

This is a great Halloween decoration, especially with you throw extra beads around. It's also good for a pirate party or to celebrate La Dia de los Muertos!

Enjoy!

♥ Shannon

Wednesday, October 3, 2012

Halloween DIY Round-Up

I have some fun apartment-friendly Halloween DIYs coming up, but first, let's take a look at projects I've done in the past!
1. This Vampire Bite Necklace is a favorite--wear it for a subtle Halloween touch!
2. Keep your costume cute with this hairpiece inspired by The Birds.
3. Repurpose thrifted goods to make this spooky Halloween Wreath!
4. Be ready for the next full moon with this Silver Bullet Necklace, you werewolf hunter, you.
5. Keep your Halloween decor personal by adding zombie touches to your favorite family photos!

Do you decorate the whole house? Just the porch? What's your favorite DIY out there?

♥ Shannon

Wednesday, May 2, 2012

Glass Bowl DIY

I adore this glazed bowl DIY from Creature Comforts--it's perfect for Mother's Day! And for my apartment...
Check out the full tutorial here.

Also, how perfect is that teapot with the orange roses? Love love love.

♥ Shannon

Tuesday, April 24, 2012

Tutorial Tuesday: DIY Gemstone Cocktail Ring

I've been loving earthy cocktails rings. Really loving. On a tight budget, you can make adorably chunky ones all by yourself!
 Supplies Needed:
--Ring Kit from craft supply store
--Stone/Gem/Anything!
--E-6000 Industrial Strength Glue
It's super easy and so fun! Plus you can customize it to be meaningful. I chose Rose Quartz because it draws love to the wearer. You can do turquoise for protection, onyx for strength, or amazonite for luck!

If you make one, send me pictures!

♥ Shannon

Tuesday, April 17, 2012

DIY Mash-Up

Remember my cute crafty strand from The Style Social Blogger Series? I was feeling torn because I love it, but it was time to take it down to start putting up art work in my work space. Then I decided to take a leaf out of Elsie's book--her Spring Art Journal, to be precise.
Original images from DesignLoveFest and A Beautiful Mess
I loved Elsie's technique for filling in a notebook with media and adding personal notes and thoughts later. If you haven't read her post yet, I highly recommend it. It's delightfully creative and inspirational as usual.
I used the cute postcards, film strips, and trinkets from Bri's event to decorate the pages of my lovely Rifle Paper Co. notebook...
...and took it with me to add notes, doodles, and song lyrics from Sucré and The Honey Trees...
...or just inspirational thoughts. I love that the pages are filled with pretty things that inspire me, so I can tuck it in my purse and write in it anytime. It's a little easier than travel art journaling.

I can't think of many things that are better than a mash-up of ideas from two of my favorite bloggers, you know what I mean?

♥ Shannon

Thursday, March 29, 2012

Easter DIY Round-Up

Easter is sneaking up quick! Here are some fun DIYs to get ready:
1. I created these Eggless Easter Eggs last year--fun colors & glitter make me happy.
2. Do I ever have a DIY round-up that doesn't include the eighteen25 girls? This Rainbow of Polish is pure genius.
3. These birds in the tree are so fantastic I feel the need to create them immediately.
4. I love this Bunny Silhouette Tray--it's such simple decor for a shelf, a dessert bar, or an entryway.
5. This Paint Chip Garland from The Sweetest Occasion is sooooo pretty. What a brilliant idea!!

I've got a few spring projects in the works I'll be sharing with you. What are you playing with?

♥ Shannon

Friday, March 16, 2012

Last-Minute Green!

If there is one thing you need on St. Patrick's Day, it is a statement piece. I plan on sporting this huge bow in my hair. Making this bow is seriously so easy--and it only takes about 10 minutes--perfect if you're in a pinch! (See what I did there? Pinch? Because it's St. Patrick's Day?)
I love that it is over-sized and playful! Definitely an eye-catcher. Here's how you do it:
Things you'll need:
-- Green fabric (9"x25")
-- Scissors
-- Barrette clip
-- Sewing machine (or needle & thread)
-- Glue gun
1. Cut off one end of the fabric (1" x 9"). Set aside.

Lay remaining 9"x24" right side up. Fold one left side over just past the center.
2. Fold the right side over just past the center so it overlaps left side. Pin top and bottom edges. Sew top. Sew bottom. It will resemble an open-back pillow case.
3. Turn right-side out.
4. Accordion-fold your bow.
5. Pinch together the center. Wrap the remaining strip around the middle. 
6. Sew or glue the ends of the strip to the back of the bow.
7. Glue the bow to the barrette clip.
8. Enjoy!
I had fun styling it with a loose pony tail and with a twisted half-up half-down look.
Next step, a bow for pups. Doodles Weaver sends her regards.

 Shannon

Tuesday, March 13, 2012

St. Patrick's Day DIY Round-Up

I just love a reason to celebrate! Growing up, the leprechauns would create a bit of mayhem: they would knock over furniture, hang underoos from ceiling fans, and dye our dairy and toilet water green (one year, even our dog!).

It's no less fun as an adult. Here are a few of my favorite crafts and projects for St. Patrick's Day:
1. DIY Green Vases & Subway Art from the eighteen25 girls. I'm totally in love with their display.
2. Super cute Paper Shamrocks from Ellinée. 
3.  Shamrock Boutonnieres from the ever-amazing Martha Stewart!
 4. Simple as That St. Patrick's Day Banner. I love the printed paper touch.
5. I'm in love with these bottle printables from Benign Objects--perfect for kids or adults!

Will you be celebrating this year?

 Shannon
Related Posts Plugin for WordPress, Blogger...